Table of Contents
Nowadays, people buy many products that come in glass jars. When they get empty, you can reuse these containers for various purposes at home. There are many ways in which you can decorate these jars for reuse. One of the best methods among all is painting them with different shades. However, you must keep in mind to pick the right paint for your glass containers.
4 Types of paint for glass jars
There are various types of paint for glass jars that are available in the market these days. Therefore, you don’t necessarily have to pick those traditional paints. Let us have a look at some top colours that you can use to renew your jars.
1. Spray paint
Are you looking forward to making a painting big pieces of the jar? If yes, then spray paint can be the perfect option for you. Mostly spray colours come in bottles or cans. Make sure to shake the can properly before you start your work. Shaking helps in mixing all the ingredients well. There might be some parts of the container that you would not like to paint. In that case, take a tape and apply it to the portion you don’t want to colour.

Hold the spray bottle at least 6 inches away from the jar to be coloured. Try painting in a horizontal manner. Apply at least 2 coats to ensure that the colour is reflecting correctly. When you are done spraying, let it dry for about 6-7 hours. Remove the pieces of tape after the colour is completely dried. Choose a premium quality spray paint to create a masterpiece for decorating your home.
2. Enamel paint
If you want full coverage and an opaque look, then you can use enamel paint. Place the container in the inverted position on the piece of wax newspaper. We do not recommend you use standard paper because the glass jar can get stuck if some paint drops on it. Using a brush, apply at least two layers of enamel paint. It will take about 21 days to air dry. If you want to bring some more shine to the jar, consider applying a few more coats of enamel paint
3. Chalk paint
Chalk paint is used for decorating furnishing items. However, you can also use it to renew your glass bottles and jars.

It is known for adding a rustic look and matte finish to the container. You can use both a paintbrush and a sprayer for applying chalk colours to the glass jars. Rub fine-grit sandpaper on the outer surface of the container to give it a distressed look.
4. Painting pens
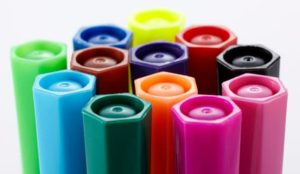
To show your creativity on the empty glass bottles or jars, make use of painting pens. It is an excellent choice for kids and novices. However, whenever you purchase these pens, ensure that they are mainly designed to be used on glass material. Go to a craft store or online store and pick pens of a variety of shades. You can also pick metallic shades for creating designs on the jar.

You can specifically use these pens to write names, digits, alphabets, or any of your favourite designs. Once you have done with your creativity, make sure to let it dry for at least 6-7 hours.
How to paint a glass bottle or jar?
Assuming you’re new to painting on material like glass, you’ll need to make sure to do it appropriately. It’s anything but intricate interaction, yet, there are a couple of things you’ll need to know before you get rolling.
1. Cleaning the surface of the jar
Cleaning is the first and primary step you must take before painting the outer side of your glass container. All of the names or labels should be eliminated, and wash the jar appropriately with sudsy water. In the wake of washing, utilize a perfect cotton fabric for drying. Scouring best liquor can likewise be utilized to wipe the surface. After appropriate cleaning, dry it before commencing your painting job.
2. Let’s begin to paint
If you’re going to work with acrylic paint, then, at that point, you will probably have to apply two layers of paint with a paintbrush or a froth brush, assuming you need to make a strong layer of paint over the entire container. After you apply the main coat, you’ll need to hang tight for around 20 minutes to allow it to dry before you apply the following coat.
To turn the container while painting, stick your hand inside it. This will assist you with trying not to leave fingerprints on the paint and getting your fingers grimy. When you apply adequate layers of paint to the sides of the container, flip it over and colour the lower part of the container. At the point when you’re done, leave the container short-term to permit the colour to dry.
If you’re working with polish-based acrylic paint, it will require an ideal opportunity to fix. This could take up to 20 days. When the colour has dried or restored totally, you can give a distressed look to the glass container using sandpaper.
Assuming you are willing to create designs on your containers, realize you might have to paint subtleties with thick, solid use of paint. If you’re increasing the value of your work, this might work surprisingly better – you can add your base tone and afterwards add lighter and more obscure qualities on top – that is naturally a subsequent layer.
3. Sealing the jar
The final step involves sealing the jar, which can be done by applying two coats of acrylic sealer. If you have created a distressed look, then consider using a matte or satin sealer. And for the shiny look, you can apply a glossy sealer
To Sum Up
Whenever you purchase jarred goods, do not think of throwing the empty jars away. Instead, show some creativity and decorate those containers to decorate your home. Learn about which paint will work the best on your glass bottles or jar from the options given above. Painting is funny and interesting and it will be beautiful when you complete the work, but make sure you have chosen the right colour and design because paint removal is not so easy.

